Category Archives: Freezing

For Fresh Rhubarb Pie All Year-Round

If you’re a fan of the tart, tangy flavor of rhubarb, then these preserving tips are for you. Once safely preserved, you’ll be able to add that one-of-a-kind taste to delicious pie, tart, and muffin recipes any time of year. You may even like to experiment with sauces or spreads. For a baked-good, sauce, and spread friendly product, try either canning or freezing your rhubarb according to the directions below.

If you are new to canning, or could use a refresher of the basics, then please read Using Boiling Water Canners and Principles of Home Canning before beginning.

Canning

Select young, colorful stalks and trim off the leaves. Wash and cut the stalks into 1/2 to 1 inch pieces. You’ll need to know how much rhubarb you have in order to figure out how much sugar to add, so measure your sliced rhubarb and then place in a saucepan. For each quart (4 cups) of rhubarb, add ½ cup sugar to a saucepan. Wait for juice to appear, and then heat gently to boiling. Immediately pack hot rhubarb mixture into hot jars, leaving 1/2 inch headspace. Release air bubbles, wipe jar rims, adjust lids, and process in a boiling water bath for 15 minutes. If you are using a pressure canning, please refer to the time tables at http://nchfp.uga.edu/how/can_02/rhubarb_stewed.html.

Freezing

Rhubarb can be frozen with or without sugar syrup. Either way, begin by selecting tender stalks with few fibers. Wash and cut into lengths that fit your freezer packaging (air-tight, moisture proof plastic or glass containers). To help rhubarb retain color and flavor, heat it in boiling water for 1 minute and cool promptly in cold water.

trayfreeze

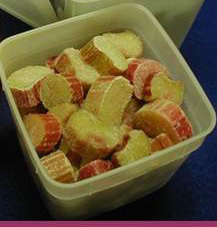
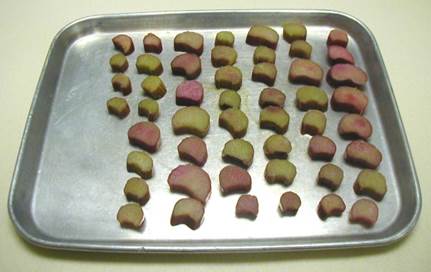
For a dry pack, tightly pack the raw or preheated rhubarb into containers, leaving ½ inch headspace. Seal and freeze. You could also tray freeze the slices in a single layer on a baking sheet just until hardened, then pack dry into your containers. Tray freezing is the best way to have loose slices easily removed from the package.

Frozen rhubarbThawed rhubarb

For a syrup pack, pre-make a  40% syrup: mix a proportion of 2 ¾ cups sugar to 4 cups lukewarm water and stir until the solution is clear. Chill syrup. Tightly pack the raw or preheated rhubarb into containers, and cover with cold 40% syrup. The amount of headspace needed depends on the size of the container and if its top is narrow or wide. See the table at http://nchfp.uga.edu/how/freeze/headspace.html to determine how much headspace you need.

Prepare for Power Outages

Along with May flowers, spring (and summer) may bring storms strong enough to knock out your electricity. Mechanical failures and human error could cause a loss of power any time of year. However it happens, here are a few rules to follow so that you are prepared when the power goes out:

Rule #1: Have blankets available. If the power goes out, keep the freezer door closed. Wrap the freezer/refrigerator in blankets, making sure they do not touch the compressor. Food will typically stay frozen for about two days.

Rule #2: Know your equipment. Try to figure out what happened and restore power as soon as possible. This may mean replacing a fuse, securing a plug back into a working outlet…or finding out from your power company when to expect electricity to return.

Freezer

Rule #3: Know your neighbors. Try to locate a working freezer/refrigerated and move items there. Sometimes a friendly neighbor can offer the power you are missing.

Rule #4: Find out where you can purchase dry ice and/or bags of regular ice. If inclement weather such as severe thunderstorms, hurricanes, or tornados are predicted to head your way but you still have enough time to safely get to out of the house, then go out and bring back dry ice or extra bags of regular ice cubes.  If you expect the power to be out for more than 2 to 4 hours, then re-pack refrigerated items into coolers with ice or dry ice. To help you estimate how much dry ice is needed, consider that a 50-pound block is enough for a full twenty cubic foot freezer for 2 to 3 days. Take caution with dry ice; handle with gloves and do not attempt to break it into smaller pieces yourself.  Do not inhale the fumes (gas) given off.

Rule #5: Put an appliance thermometer in your refrigerator and one in your freezer now.
They cost less than $5 each at most stores.  The recommended storage temperature for perishable fresh foods (nonfrozen) is 40 degrees F. If the refrigerator or freezer temperature is above 40 degrees F, and it could have been for more than 2 hours, play it safe and do not eat perishable or completely thawed foods. Many frozen foods can be saved if they still have ice crystals in them.  See What to Do if the Freezer Stops for more details.

Rule #6: Get a food thermometer and keep it calibrated. Once power is back, check the internal temperature of your perishable foods before eating. If food has been 40 degrees F or higher for more than 2 hours, then discard it.

Kitchen thermometer

More information about how to calibrate your thermometer is available from the USDA Food Safety and Inspection Service. More information about storing food and water for emergency preparedness is available from the University of Georgia.

Information in this entry comes from What to do if the Freezer Stops and Preparing for Power Outages.

Freezing Fruits for Summer Smoothies

Springtime often brings warm sunshine, cool breezes, fresh fruits…and the opportunity to plan refreshing treats for the hot summertime ahead. Fruit smoothies in the summer are not only a welcomed way to cool down but are also nutritious, delicious, and easy to prepare. Due to the popularity of smoothies, recipes are easy to find; look online, on product packaging, and in books and magazines. Once you get the hang of it you’ll be making recipes of your own.

A medley of frozen fruits from our global food suppliers helps you mix-and-match a variety of flavors with fresh fruits and berries that will be ready for harvest later in the season. Fruits like bananas, pineapple, and mango are not typically grown in the United States, but are available year-round at grocery stores. These three fruits in particular add consistently tasty flavor and texture to smoothies. Keeping them frozen allows you to use them in smoothies as you would otherwise use ice cubes- but fruit “ice cubes” pack a lot more flavor than regular ice cubes!

Freezing these fruits for smoothies is simple:

–          Make sure your freezer is set to 0°F or below.

–          Select fruits that are mature, ripe, and at their peak of freshness.

–          Work under sanitary conditions; freezing does not destroy enzymes or kill microorganisms, it just slows their effects.

–          Peel fruits, remove cores or seeds as needed, then slice into chunks about the size of regular ice cubes.

Pieces of Fruit on Tray for Freezing

–          Enzymes may still cause browning of fruits, so you may want to add ascorbic acid, citric acid, or lemon juice before freezing. Refer to http://nchfp.uga.edu/how/freeze.html for exact quantities.

–          You might also want to place the fruit pieces on cookie sheets or trays to freeze them individually before packing them for storage. This step makes it easier to separate them for use.

–          Store the pieces of fruit in a rigid container or plastic bag that holds one half-gallon or less so that all pieces freeze fast enough to produce a satisfactory quality. Choose containers that are moisture-vapor resistant, durable, leak-proof, easy to seal, and easy to mark. Label with the type of fruit and date for easy identification.

OLYMPUS DIGITAL CAMERAFrozen Fruits in Rigid Containers

Depending on where you live and from where you get your fruit, you might already be seeing strawberries fresh off the vine. Sooner or later you might also have fresh peaches, raspberries, blueberries, and/or blackberries. Whatever your local flavor, having some frozen fruits stored in the freezer will allow you to blend a fresh, cold smoothie whenever you like!

Freezing soup

Who doesn’t enjoy freezing cold soup in the wintertime? …after it’s reheated, of course! Another option for soup lovers who don’t want to pull out the pressure canner this season is to freeze soups. Here you’ll find how-to tips and recommendations for freezing soups successfully.

24 hours before putting soup into your freezer, drop the freezer temperature to -10°F. Once soup has frozen, hold at 0°F. If you already have a freezer that’s set to the 0°F and there’s space open in it, then freezing is more likely to be an economical choice for food preservation. If you also have airtight containers to use instead of buying new ones, then the cost is even less.

Frozen corn and tomato productIMG_1159

Which kinds of containers work best? Rigid containers like plastic cartons or glass jars designed for canning and freezing. Keep in mind thought that many common household containers are not suitable because you’re looking for moisture- and vapor-resistant materials that produce an airtight seal (i.e. not your average yogurt or milk container). Hint: wide-mouth jars make it easier to remove the contents before complete thawing. One other option is to pour the soup into ice cube trays!

An advantage of freezing soup is that you can portion individual servings (or servings for 2, 3, 4…), making it easy to reheat just one portion at a time in order to produce your desired quantity. No container should be so big that the soup will take a long time to become frozen; that leads to poor quality. Another benefit of freezing is that certain ingredients intensify in flavor after freezing, such as pepper, cloves, garlic, green pepper, celery seasonings and some herbs…but beware; they could also become bitter overtime. Other cautions: onion and paprika change flavor, curry develops and off-flavor and salt loses flavor. Simple solution: season lightly before freezing then add more seasonings after reheating.

Just like some fruits and vegetables freeze better than others, some soup recipes will maintain a higher quality than others. It’s generally suggested that you leave out potatoes from soups that you plan to freeze. Another tip for best quality is to concentrate the product by using less liquid. You can always add more liquid (broth, tomato juice, cream, water) when you reheat it.

After preparing your delicious soup, it’s important to cool it quickly, so that large ice crystals don’t form- that would lead to a mushy consistency. To do this, put the pot of soup in a pan or sink of ice water. When cool, package and freeze immediately, placing containers against the surfaces of the freezer for the fastest freeze. For highest quality, enjoy frozen soup within 4-6 months.

IMG_0193

Do not put hot glass in the freezer (or in ice water); it may break. It’s also important to leave headspace so that the soup doesn’t break the container as liquids expand in the freezing process. The exact amount of headspace needed depends on the contents of your soup, but leave at least ½-inch for mostly solid soups and 1½-inches for mostly liquid soups.

Unlike other frozen foods, it is recommended that you do not thaw your soup, but rather reheat it immediately after removal from the freezer. Heat it to a rolling boil, or at least 165°F. If it’s a cream soup, then heat over boiling water, double-boiler style. Soups with dairy may curdle and separate, so stir while reheating to keep smooth. Here’s another tip: add a waxy rice or corn flour as a thickener.

Information in the entry comes from ‘Freezing Prepared Foods’ and So Easy to Preserve.