Category Archives: Food Safety

Dry Canning Raw Vegetables is an Unsafe Practice

Some people are experimenting with canning fresh vegetables their own way instead of following research-based processing from USDA. The USDA home canning procedure is meant to kill spores of Clostridium botulinum, the bacteria that cause the potentially deadly botulism poisoning.  The latest version of people making up their own method that is potentially very hazardous has been brought to our attention through emails and calls to the USDA Hotline. It involves putting raw vegetables (such as corn, green beans, carrots, beets or other vegetables) in canning jars with no added liquid, applying lids and pressure canning for the same amount of time as if you had added the water to cover required in the USDA method.

What is hazardous about this “dry canning” of vegetables?

  • In the pressure processes we have to recommend for home canning of vegetable, the liquid covering pieces of vegetables in the jars is required for the expected heat penetration throughout the jars during processing. The food must be prepared and jars filled just as described for the USDA process time to work as expected in killing bacteria of concern.
  • It is well known that bacteria and bacterial spores are more sensitive to wet heat than dry heat. They will die in hot dry air much slowly than in hot water. So, if the process was researched with water or other liquid in the jars, it is not expected that the same process time will be long enough heating for a jar without the liquid in it.
  • The risk here is botulism, which is a food poisoning disease that can be fatal (or kill people).  Botulism toxin can be present in canned vegetables without any visual changes to the food or odors.  Please read what the Centers for Disease Control and Prevention (CDC) has to say about botulism and home canning, and particularly note the section on here called What is Botulism: https://www.cdc.gov/features/homecanning/index.html

Sliced carrots in home canning jar without water and a red X with saying "needs water over carrots to process"Home canned carrots in jars with water covering the carrots


But people say it works and like the food…

  • Someone can get lucky and not get sick from trying this. Bacteria are not distributed evenly throughout our environment. But the next time, Clostridium botulinum or other harmful bacteria can be in the jar and botulism poisoning could result.
  • And by the way, some people who have made up this method on their own are adding butter or ghee even if no water. These are no substitute for the required liquid in the jars, either. And these should not be added to the jars even with liquid in research-based processes if not called for in the original instructions.

Home canning and creativity

  • Canning preservation of food is not a creative activity about how to produce the best quality only. Safety must come first, and the researched processes we have for vegetables require the liquid cover in the jars (and whatever is the type of liquid called for in the described procedure with each process, which is usually water for plain vegetables).​
  • Again, the USDA low-acid home canning recommended processes are meant to be used with the full procedures as written — how to select and prepare the food, how to fill jars, how to manage the step by step canning process in a recommended pressure canner type, and how to make altitude adjustments.

Be food-safe when home canning, please, and stay with properly researched and tested procedures.

Recommended procedures for home canning of vegetables: https://nchfp.uga.edu/how/can4_vegetable.html and read about safe canning here: https://nchfp.uga.edu/ and https://nchfp.uga.edu/how/general.html

###
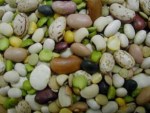
Canning Dry Beans: It Matters How They Go in the Jar

As a low-acid food, all beans require the use of a pressure canner for preservation by home canning, unless they are sufficiently pickled (acidified) to bring them out of the low-acid food category. But pressure canning isn’t a magic bullet if you don’t know the safe way to prepare food and carry out the right process for each food type and style. If you are new to pressure canning or could use a refresher of the basic how-to, then please read Using Pressure Canners before beginning. If this is your first time canning, then also read Principles of Home Canning from the USDA Complete Guide to Home Canning. 
Recommended procedure for home canning of dry beans

The USDA recommended process in the Complete Guide to Home Canning for home canning dried beans require a hydration step prior to filling jars:   https://nchfp.uga.edu/how/can_04/beans_peas_shelled.html

The options are to (1) place sorted (for stones or other contaminants) dried beans or peas in a large pot and cover with water. Soak the beans 12 to 18 hours in a cool place. Then drain off the soaking water and do not use it in canning the beans. The other option is, to more quickly hydrate the beans (2) cover the sorted and washed beans with boiling water in a saucepan. Boil them 2 minutes, remove them from the heat, soak them 1 hour and then drain. That cooking water is also not used in canning the beans.

The procedure then calls for covering drained beans hydrated by either method with fresh water and boil 30 minutes. The USDA canning process recommendation is for a hot pack prepared this way only: hot beans boiled 30 minutes then filled quickly into jars while still hot. (But of course being careful not to burn yourself, as with all canning steps.) Optional salt can be added to the beans in the jars if desired (½ teaspoon of salt per pint or 1 teaspoon per quart jar). The jars with cooked beans (and salt if added) then get filled with the hot cooking water, leaving 1-inch headspace. As with all jars packed this way, water should cover the food pieces for expected heat distribution during processing and best quality in storage of the canned beans.  See the link above for full instructions and the processing times and temperatures (pressures) for pints vs quarts, and for various altitudes.

Do not put dry beans directly into the jar

According to inquiries I get, and what I read elsewhere on the Internet, it is popular practice to put dry beans in the jars, cover them with water and put them into the pressure canner that way. Unfortunately, I have never found or been shown research for home canning that has determined what the process time should be for dry beans filled into jars in this manner.  A safe process time is partially dependent on jar size and type of food, yes, but it is also partially dependent on the texture of the food, the temperature of the food and liquid, and the weight of the food filled into jars.  Dry beans sitting in water at the start of the process time will not heat up at the same rate as beans prepared as described in the research-based method described above and in the USDA materials. The final sterilization of the jar contents achieved by the end of the process will not be the same as when the process is applied to jars filled as described in the recommended methods.  People canning their dry beans by other methods, and especially by starting with dry beans in the jars, are taking a big risk on food spoilage and possibly botulism food poisoning.  Those doing this and getting away with it have just been lucky – so far. If you choose to do it, you are taking a chance by your own decision.

Additional home canning options for dry beans

There are also different processes for different types of beans and dry bean recipes for home canning. For canning dry beans, there are research-based processes in the USDA database for Baked Beans, prepared as described in the process directions, and Dry Beans with Tomato or Molasses Sauce versions provided.

Home canning of fresh beans

If you have fresh beans of the Lima variety, then follow these directions for Fresh, Shelled, Lima Beans. Follow these similar procedures, but slightly different directions for Snap and Italian Green and Wax Beans. As you’re deciding whether to prepare a hot pack or raw pack, remember that hot packs are often considered to produce the highest quality final product, and you can often fit more beans into one jar, even though raw packs do cut down on the prep time.

The home canning processes which we can recommend for these various bean products can be found at the National Center for Home Food Preservation website at this menu: https://nchfp.uga.edu/how/can4_vegetable.html .

Be safe when canning and use research-based processes for all your beans

Please be safe in your home canning choices. The research-based processes available may seem very limiting and traditional but there has been little public funding for researching new recommendations in a long time and there are few labs set up and staffed to do home canning research. You can flavor or combine your home canned vegetables with other ingredients after opening them, at the time of serving, rather than risk botulism or losing money from spoiled food from making up a process for your own recipes. This solution doesn’t address choosing an easier way to fill jars than has been tested such as with dry beans, but is something to consider for other food choices.

Even though this has been about dry beans, I hope you all are looking forward to another season of local, fresh vegetables coming in like I am!

###

A Good Time to Clean Out the Pantry

At this time where our national leaders and health experts are asking us to keep physical distance from others, remotely work from home if possible, cancel events and gatherings and generally spend more time at home, take advantage in the kitchen. Many of us could take stock of supplies in our food cabinets we may not have considered in a long time. You might find inspiration to re-discover pleasure in home cooking or just discover items you didn’t know you have!

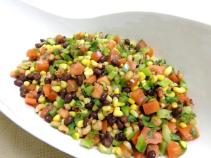
cowboy caviarCanned vegetables and meat can be used for soups, casseroles or even side salads. Canned beans, chickpeas and green beans could be used for a marinated three-bean salad (or four or more!) and dressed up with just a little seasoned vinegar if you don’t have salad dressing.  Try some dried herbs in there if you don’t have fresh or find some surprises in your spice cabinet. If you don’t have fresh tomatoes but like the look of the mix I’ve pictured, you can use canned diced tomatoes instead.
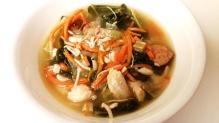
soup photoCanned stock and vegetables along with some canned meat (or not) and beans can also make a tasty soup when you can be free to try your own seasonings.  (I know my homemade soup in the photo has some fresh kale and sausage in it, also, but hey, I had them to use. I just wanted to get your creative juices flowing.)

While you are in the pantry, think about giving it a good cleaning. A lot of us do not have the discipline to have been doing this on a regular basis throughout the year. When removing items to check your stock, take them all out and keep them out long enough to wash and dry shelves before replacing the food items. Use household cleaners (and EPA-registered disinfectants or a bleach solution if you also sanitize) that are appropriate for the surface in your pantry, following label instructions. Labels contain instructions for safe and effective use of the cleaning product including precautions you should take when applying the product, perhaps such as wearing gloves and making sure you have good ventilation during use of the product.  Then, before putting your foods and storage containers back, wipe them off with a warm, soapy dish cloth and dry with a paper towel (or clean cloth towel if paper is an issue for you at these times of short supply).

Remember when preparing food, wash cutting boards, dishes, utensils (including knives), and countertops with hot, soapy water after preparing each food item and before going on to the next food.  Then, sanitize cutting boards and kitchen countertops using a kitchen sanitizer. One teaspoon of liquid chlorine bleach per quart of clean water can also be used to sanitize surfaces. Leave the bleach solution on the surface for about 3-5 minutes to be effective. It is best to let surfaces air dry, but if you have to, rinse with cold water and pat dry with fresh paper towels. (If you are in household with a person ill from COVID-19 or suspected ill from it at this time, follow CDC advice for cleaning and disinfecting: https://tinyurl.com/vyc9tdv)

Consider using paper towels to clean up kitchen surfaces. Then the germs get thrown away with the towels! Knowing paper supplies are in demand now and short supply, launder cloth towels often, using hot water. Do not dry your hands with a towel that was used to clean up raw meat, poultry, or seafood juices. These raw juices can contaminate your hands and other surfaces. Put those towels immediately into the laundry bin and wash soon.

Check out your refrigerator also. Wipe up spills immediately. However, while you are in the deeper kitchen cleaning mode, clean the inside walls and shelves with hot water and a mild liquid dishwashing detergent; then rinse.  Once a week, you should already be checking expiration and “use by” dates on refrigerated foods.

Back to preparing food, especially if that has not been your regular kitchen activity for a while. Always keep raw and ready to eat foods separated. Cross-contamination is the word for how bacteria can be spread from one food product or to another, or from a dirty surface or hands to food. This process begins at the grocery store and continues with carry home bags, and your refrigerator. Use one cutting board for raw meat, poultry, and seafood and another cutting board for ready to eat foods. Never place cooked food on a plate that previously held raw meat and poultry unless the plate has been thoroughly cleaned.

Cook food to the proper temperature. Use a food thermometer to make sure meat and poultry are cooked to a proper temperature and keep a cooking internal temperature chart handy. Chicken and turkey should be cooked to an internal temperature of at least 165°F to be safe; ground meat and meat mixtures to at least 160°F; egg dishes like quiche to at least 160°F; seafoods to at least 145°F ; beef and other red meat roasts and chops to at least 145°F with a 3-minute stand time before serving. Use a clean, calibrated food thermometer to check the food for doneness in at least two places in the center or the thickest part. For reasons of personal preference, many people prefer to cook chicken and turkey to higher temperatures such as 170-180°F to remove pink appearance and rubbery texture. Thoroughly reheat leftovers to 165ºF internal temperature and be sure to bring gravies, sauces and soups to a rolling boil.

Finally, chill everything promptly! Refrigerate or freeze leftovers within 2 hours by placing them in shallow containers to cool rapidly. Keep the refrigerator temperature at 40ºF or below and the freezer at 0ºF. Monitor the temperature with an appliance thermometer. Always thaw food in the refrigerator, in a cold water bath of running water, or in the microwave right before cooking it.

For more information on storing foods, including freezer packaging choices and headspace for freezer containers, see general sections on these topics available from the National Center for Home Food Preservation at the University of Georgia, https://nchfp.uga.edu.  Also see the Food Keeper app and website: https://www.foodsafety.gov/keep-food-safe/foodkeeper-app

###

But my jars sealed…

Often when people ask if their canned food is safe even though they know or have been told they processed them unsafely, they end by saying “the jars sealed”.  Or, they are finding really old home canned jars of food they forgot about, or found, when cleaning out a relative’s home. “They’re sealed so shouldn’t they be safe?” Here is short posting to say that a sealed jar is not a sign of food being processed safely!

A vacuum seal that forms on a canning jar after processing only means that there is a sealed_lidvacuum holding the lid on. To create a vacuum requires enough heat produced in the contents and the lid and then a cooling process that draws the vacuum.  The heat required to form a vacuum seal with today’s canning lids is much less than the heat needed to sterilize most foods.  Killing of spores of C. botulinum bacterial spores in low-acid foods, for example takes much more thorough and severe heating throughout the food mass than the heat needed to sufficiently warm the lid and headspace for vacuum to form after cooling.

Even killing of harmful bacteria like E. coli or others of concern in acid foods would take more heating of the jars of food than that needed to cause a vacuum seal to form during cooling. Enough heat has to get distributed throughout all parts of the mass of food in the jar to get to wherever the bacteria might be.

If a food was processed safely, a vacuum seal then needs to be maintained during storage of canned foods on the shelf to keep the food safe. The vacuum seal prevents food from being re-contaminated (and drying out). But a vacuum seal by itself is not a sign that the food inside was processed correctly to make the food safe.

###