Looking for a Gift that Keeps Giving? Try a Dehydrator!

Trays with fruits and veggies

For your “foodie” friend or family member, a dehydrator might make a great gift. Effective and efficient at drying apple slices, chili peppers, figs, fruit leathers, jerky and more, food dehydrators are a favorite appliance of avid home food preservers.

Why not just use an oven? Using an oven may be reasonable option, but not all ovens maintain a temperature low enough to dry without baking (140 degrees F). Oven drying also requires leaving the oven door cracked open with a fan blowing to provide circulation, requiring a substantial input of energy and time. Dehydrators are small, counter-top appliances designed to dry foods quickly using an electric element for heat and a built-in fan and vents for circulation.

Dehydrators w copyright symbol

There are two main types of dehydrators: units with horizontal air flow and units with vertical air flow. Horizontal air flow design places the heating element and fan on the side of the unit, whereas vertical air flow design contains the heating element and fan at the bottom of the unit. The limited capacity of horizontal flow models can be a disadvantage, while most vertical flow models allow for more trays to be stacked on top of one another. The height of food pieces is more limited with the vertically stacked trays, however, as compared to some horizontal flow cabinets.  Also on the plus side, models with horizontal flow reduce flavor mixture if you are drying different types of foods at the same time, and heat is distributed evenly across all trays.

You can find dehydrators in natural food stores, the small appliance section of department stores, and mail-order catalogs. Costs vary. Before buying the first one you come across, consider this list of dehydrator features to look for:

–          Enclosed heating elements

–          Fan or blower

–          An enclosed thermostat

–          Double wall construction of metal or high grade plastic

–          Four to 10 open-mesh trays made of sturdy, easy-to-wash plastic

–          UL seal of approval

–          One-year guarantee

–          Convenient service available if needed

–          Dial for regulating temperature

–          A timer that can be set to turn unit off (very helpful when drying lasts into the night)

–          Availability of tray liners to purchase for making fruit leather if desired

Dryer with Liner

© Andress, E.L., Harrison, J.A., eds. (2006). So Easy to Preserve, 5th ed. Athens, GA: University of Georgia Cooperative Extension.

Botulism: Think Outside the Jar

Since it’s that time of year that foods may be prepared well ahead of time, then packaged and transported to be shared with family, friends, and co-workers, it seems timely to spread awareness about less-known situations that have the potential to lead to botulism: Did you know that it is possible for botulism to come from non-canned food items? As mentioned in a previous posting called “Botulism: Surprises”, botulism has been linked to other foods, including unrefrigerated salsa, baked potatoes in aluminum foil, garlic in oil, fermented fish, and honey. Following are a few true tales to provide important details and inspire caution…

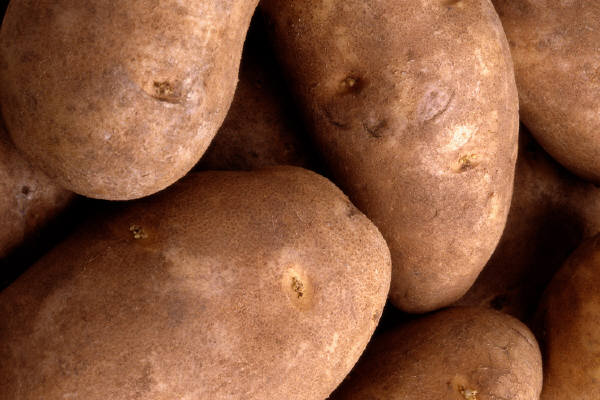
In 1994, in Texas, 30 people were affected by an outbreak of botulism from restaurant dips made with baked potatoes wrapped in foil and left at room temperature (apparently for several days) prior to being used the dips. In this case, the spores of Clostridium botulinum (which are readily found in soil) survived the heating process (which is to be expected), remained moist, and were then so tightly wrapped in aluminum foil that oxygen was kept out of the packaging, creating an anaerobic environment in which the botulism toxin could form. Oil covering a food, as with garlic in oil, also creates an anaerobic environment.

real potatoes

Not even processing your homemade salsas but putting them in tightly sealed jars (again, an anaerobic environment) left at room temperature is a big risk. Botulism could result if the salsa is too low in acid, and other problems besides botulism could occur even in more acid salsas. Tomatoes (and figs and Asian pears) are borderline pH foods, so we see recommendations to add some acid to jars even before treating them as boiling water canned foods. Fermented fish and fermented vegetables that do not finish fermenting to a truly acidic pH are other examples of foods that might not be acidic enough to prevent the botulism-causing toxin from forming.

Another situation that has caused botulism is pickled eggs left at room temperature. In 1997, in Illinois, a 68-year-old man developed symptoms of botulism – double vision, inability to speak, difficulty breathing – that was traced back to homemade pickled eggs. Testing confirmed the presence of type B botulism toxin. To prevent the toxin from forming, pickled eggs should be stored in the refrigerator and only be at room temperature for serving time; limit their time in the temperature danger zone (40 degrees F to 140 degrees F) to no more than 2 hours. Pickled egg recipes and storage guidelines can be found on the NCHFP website.

Early in 2011, two people got botulism from eating commercially made potato soup intended for refrigerator storage but kept in their homes at room temperature.  One case was in Georgia and one in Ohio.  Both people bought the soups from a refrigerator case, left them out of the refrigerator at home for a long time and then tasted them.  Bad decision!  Each individual spent a long time in the hospital and then were transferred to rehab facilities with respiratory issues. Unfortunately we do not know the ultimate outcome today.

It may now seem like botulism can come from anywhere, but that’s not true; Clostridium botulinum bacteria require specific conditions to be able to grow and produce the botulism-causing toxin. Understanding what’s involved in the formation of the toxin will help you know how to prevent it:

In order to grow and produce the botulism-causing toxin, C. botulinum bacteria must be kept in a very low-oxygen (anaerobic) environment with a pH above 4.6 (low acid foods) and a relatively high moisture content.  If these conditions are met, any temperatures in a wide range around anyone’s “room temperature” and definitely above 40 degrees F will allow the bacteria to multiply and produce toxin.  (Sometimes the temperature even can be a little cooler than that for some types of C. botulinum and they will still multiply.)

Pressure Canner

Awareness and action is the key to prevention. To avoid botulism, avoid the risk of containing C. botulinum in a low acid, moist, anaerobic environment and if you do so (you canners out there know who you are), then be sure to process your low-acid food products in a canner equivalent to at least 240 degrees F (achieved when your pressure canner reaches the recommend amount of pressure, after venting, for your altitude) for the recommended amount of time.

Click here to view the full article of ‘Foodborne Botulism From Eating Home-Pickled Eggs —Illinois, 1997‘ from the Centers for Disease Control and Prevention. Here is the full publication ‘A Large Outbreak of Botulism: The Hazardous Baked Potato‘.  And here is the short story of botulism from potato soups in 2011.  

The Hunt is On: Know the Basics of Venison Preservation

Exact dates for deer hunting season vary across the United States, but wherever you are, fall is the time of year that deer are most active and most actively hunted. To help you make the most of your wild game, here are a few tips and recommendations (follow the links below) for safely preserving the highest quality venison.

Sanitation begins in the field. Be careful not to contaminate the carcass when field dressing the deer. Cool the meat to 35 to 40 degrees Fahrenheit as quickly as possible.

Proper aging reduces the game taste, tenderizes tissues, and gives the meat better cutting quality. Never age meat at room temperature. Age meat at an air temperature of 40 degrees F or less for no more than 2 to 3 days in a clean, dry, well-ventilated storage facility. If you are making sausage, then aging is not needed.

Refrigerated meat needs to be used within 2 to 3 days.

Freezing Venison:

Fat goes rancid quickly, so trim fat and clean cuts. For best quality, separate into meal sized portions (usually about one pound) then either use a vacuum sealer or wrap the meat tightly in waxed paper, plastic freezer wrap, aluminum foil, or plastic freezer storage bags, and if not already sealed then seal in a freezer bag or container. Remember to label and date each package. Freeze quickly at 0 degrees F or below. At this temperature, store venison for up to 9 to 12 months.

Labeling plastic freezer bag

Venison Sausage:

Breakfast-type Sausage

Summer Sausage and Smoked Sausage

Quick Sausage and Wild Game Polish Sausage (page 9)

Canning Venison:

Strips, cubes, or chunks

Mincemeat

Chile Con Carne (substitute venison for beef)

Curing/Smoking Venison:

Corning; Sweet and Hot Pickle Cure

Dry Curing Game

Venison Jerky

Pieces of meat on dryer trayEnjoy! jerky

Information in this document is based on Resources for Home Preserving Venison by Brian Nummer and Proper Care and Handling of Venison from Field to Table by Penn State Cooperative Extension.

Apple Abundance

Apple jelly jarsIf your apple season is winding down with A LOT of apples, or if you stumble into a great sale at the grocery store, then you likely have enough apples to make apple juice and/or jelly!

First, prepare apples for extracting their juice. If you plan to make jelly and use purchased pectin, then you can use all ripe apples. If you are going to make jelly and rely on only the natural pectin in apples, then use ¼ slightly under-ripe apples and ¾ just ripe apples. Make juice in small batches – about 3 pounds of apples with 3 cups water will produce 4 cups apple juice. Sort the apples, discarding damaged portions. Wash the apples and cut them into pieces, but DO NOT remove skins or cores – the pectin is most concentrated in the skins and cores.

Now you’re ready to extract the juice. Place fruit into a flat-bottomed saucepan and add one cup water per pound of apples. Bring to a boil on high heat and stir to prevent scorching. Reduce heat and cook until soft, about 20 to 25 minutes. Be careful not to overcook; too much boiling will destroy the pectin, flavor, and color.

To clarify the juice, pour the entire contents of the saucepan into a damp jelly bag and suspend the bag so that the juice drains into a large bowl. For the clearest juice (and therefore the clearest jelly), do not press or squeeze the jelly bag.

using-a-jelly-bag

Once the juice is clarified, you may freeze it. Be sure to leave 1½-inch headspace and use a moisture-proof, durable freezer container. If you think you might use the juice for jelly, then do not presweeten it before freezing.

If you want to can the juice as is, follow these directions for canning Apple Juice in a boiling water canner. (Note: you could also can local cider from a cider maker; try to can it within 24 hours after being pressed.)

Follow these directions if you want to use the juice in Apple Jelly without added pectin.

Refer to pectin product packaging and follow those directions if you prefer to make jelly with added pectin.

© Andress, E.L., Harrison, J.A., eds. (2006). So Easy to Preserve, 5th ed. Athens, GA: University of Georgia Cooperative Extension.