Some people are experimenting with canning fresh vegetables their own way instead of following research-based processing from USDA. The USDA home canning procedure is meant to kill spores of Clostridium botulinum, the bacteria that cause the potentially deadly botulism poisoning. The latest version of people making up their own method that is potentially very hazardous has been brought to our attention through emails and calls to the USDA Hotline. It involves putting raw vegetables (such as corn, green beans, carrots, beets or other vegetables) in canning jars with no added liquid, applying lids and pressure canning for the same amount of time as if you had added the water to cover required in the USDA method.
What is hazardous about this “dry canning” of vegetables?
- In the pressure processes we have to recommend for home canning of vegetable, the liquid covering pieces of vegetables in the jars is required for the expected heat penetration throughout the jars during processing. The food must be prepared and jars filled just as described for the USDA process time to work as expected in killing bacteria of concern.
- It is well known that bacteria and bacterial spores are more sensitive to wet heat than dry heat. They will die in hot dry air much slowly than in hot water. So, if the process was researched with water or other liquid in the jars, it is not expected that the same process time will be long enough heating for a jar without the liquid in it.
- The risk here is botulism, which is a food poisoning disease that can be fatal (or kill people). Botulism toxin can be present in canned vegetables without any visual changes to the food or odors. Please read what the Centers for Disease Control and Prevention (CDC) has to say about botulism and home canning, and particularly note the section on here called What is Botulism: https://www.cdc.gov/features/homecanning/index.html


But people say it works and like the food…
- Someone can get lucky and not get sick from trying this. Bacteria are not distributed evenly throughout our environment. But the next time, Clostridium botulinum or other harmful bacteria can be in the jar and botulism poisoning could result.
- And by the way, some people who have made up this method on their own are adding butter or ghee even if no water. These are no substitute for the required liquid in the jars, either. And these should not be added to the jars even with liquid in research-based processes if not called for in the original instructions.
Home canning and creativity
- Canning preservation of food is not a creative activity about how to produce the best quality only. Safety must come first, and the researched processes we have for vegetables require the liquid cover in the jars (and whatever is the type of liquid called for in the described procedure with each process, which is usually water for plain vegetables).
- Again, the USDA low-acid home canning recommended processes are meant to be used with the full procedures as written — how to select and prepare the food, how to fill jars, how to manage the step by step canning process in a recommended pressure canner type, and how to make altitude adjustments.
Be food-safe when home canning, please, and stay with properly researched and tested procedures.
Recommended procedures for home canning of vegetables: https://nchfp.uga.edu/how/can4_vegetable.html and read about safe canning here: https://nchfp.uga.edu/ and https://nchfp.uga.edu/how/general.html
###

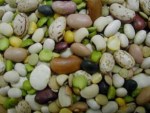 As a low-acid food, all beans require the use of a pressure canner for preservation by home canning, unless they are sufficiently pickled (acidified) to bring them out of the low-acid food category. But pressure canning isn’t a magic bullet if you don’t know the safe way to prepare food and carry out the right process for each food type and style. If you are new to pressure canning or could use a refresher of the basic how-to, then please read
You must be logged in to post a comment.