Dry grains and beans in canning jars

“Dry Canning” Isn’t Canning To Me

Quite a few people are circulating directions for what they call “dry canning” as a method of storing dried foods. It is not a food preservation method we recommend.

What is canning?

Just because canning jars are used in “dry canning” does not mean the suggested procedures fit the classic definition of canning.

Canning as a method of food preservation or processing refers to a procedure of heat treating closed containers of food with the goal of producing what is called a “commercially sterile”, vacuum sealed-food that can then be stored safely at room temperature. The preservation goal is to kill any spoilage and pathogenic (harmful) microorganisms that otherwise would be able to survive in food at room temperature storage. In some categories of foods, bacteria can also be controlled by acidity or moisture control as well as the heat of canning. In other foods (e.g., low-acid or slightly acid foods) heat usually has to do the whole job. Different foods will have different microorganisms targeted for killing or control, depending on the nature of the food.

Why dry canning isn’t canning

Canning is done with moist foods because the moisture inside the container would support the growth of microorganisms. Dried foods do not have the same concerns even if a food is low-acid because the removal of available moisture limits or prevents the growth of microorganisms. Storage of dried foods for long periods of time will take into consideration means to preserve food quality, however, as well as preventing reabsorption of moisture into the food.

“Dry canning” techniques I see circulating call for putting dried food like grains, beans, and nuts, into canning jars. In some methods, canning lids are then placed on the jars and the jars heated in an oven. Usually about 200°F is recommended. In other directions, the food in jars is heated without the lids, which are then placed on the jars when they come out of the oven.

These procedures do not describe true canning preservation of food but instead would be considered a method of packaging dried foods for storage — one that, again, we cannot recommend because of several issues with it.

Issues with dry canning

Here are some issues to think about with this concept:

  1. This process is not “canning” just because it uses canning jars.
  2. It is unknown if this process can sterilize the food, although it might cause vacuum sealing of jars. This would not be a time and temperature combination known to kill many bacterial spores or mold spores.
  3. This method does not remove all of the oxygen from the jar before sealing and may trap moisture from the food if condensation occurs. While the presence of spores would not be an issue in very dry foods, any moisture pockets say from condensation or incompletely dried foods could be a problem. Moisture in the jar with some retained oxygen could support the growth of airborne molds or even bacteria not killed by the low heating in some seemingly dry foods. Some foods may seem dry to the consumer but still have enough moisture in them to come out upon heating and closing up in a container. This could be especially true of home dried foods.
  4. The dry oven process used at home has never been shown to sterilize these various dry foods or produce the claimed extended shelf life with quality. In fact, there is no known researched shelf life for foods packaged just this way at home.  (If someone can lead me to the research I have not been able to find, please let me know.) Extended shelf life expectations are available for dry foods prepared and packaged by other methods (see the Utah State University Extension references below).
  5. This heating could even make the quality of some foods worse.  This could be either by moisture condensation upon cooling, or if the food is lipid-containing nuts and grains, increased enzymatic reaction causing rancidity.
  6. A major manufacturer of canning jars and lids in the U.S. does not support the use of their jars and lids/sealing compound in this manner.
  7. Because this type of process is not recommended, doing it can be a waste of resources, time and energy.

Recommended storage methods for dry goods

dry_bean_light

Photo by E. Andress


Thoroughly dried foods can be stored a fairly long time in airtight containers at moderate room temperatures or in the freezer. If you want to vacuum seal containers of dry foods, methods that will preserve them safely and provide better food quality include:

(1) A vacuum sealing machine that has adapters for jars in addition to sealing bags if you want your food in jars.  This vacuum packaging is done at room temperature without heating the food.

(2) Oxygen absorbers inside your containers of these foods.  Oxygen absorbers can help preserve the quality of foods and also aid in insect control.

(3) If you are using the heating method to control for possible insect contamination of your dried food, the Utah State University booklet linked below has methods for heating and then cooling dry foods BEFORE they are packaged for storage. It also describes freezing procedures before packaging as an alternative to insect control. Even heating some foods on an open oven tray before packaging can cause some flavor changes that using the freezing method would not.

Utah State University Extension methods, for example, for long-term storage of dry rice and beans:

10-year storage of rice: https://extension.usu.edu/foodstorage/howdoi/white_rice

10 or more years for beans:  https://extension.usu.edu/foodstorage/howdoi/dry_beans

And here is a large book/booklet from Utah State University about storing food, A Guide to Food Storage for Emergencies, with more specific information and the oven or freezing methods for insect control:

https://extension.usu.edu/foodstorage/ou-files/Food_Storage_Booklet2.pdf

I would like to thank my colleagues in some other states for helping to review and contribute to these points. Nancy Flores at New Mexico State University helped get some organization and formatting to them, and Karen Blakeslee at Kansas State University helped with review and additions.  There were others who initially reviewed my first version and I thank them also.

###

Get Ready Now for the Summer Harvest

seeds_ela

If you are thinking about joining the trend in our communities to preserve food this summer, start planning and preparing now! Start by checking your equipment and supplies. Proper equipment in good condition is required for safe, high quality home canned food, for example.

If you’ve not yet purchased your needed equipment, there are two types of canners to consider: boiling water canners and pressure canners. A boiling water canner is used for canning acid or acidified foods like most fruits, most pickles, jams and jellies. Boiling water canners cost about $30-$100, or can be assembled yourself with a large stock pot, secure lid, and rack to keep jars off the bottom of the pot.

A pressure canner is essential for canning low acid foods such as vegetables, meats, fish, and poultry. Temperatures inside pressure canners reach higher than boiling water canners (for example, 240°F and above as compared to about 212°F). This is necessary to follow the tested processes available to be sure and kill the toxin–producing spores of the bacteria Clostridium botulinum.  If not killed, these spores can grow out and produce a deadly toxin (poison) in room-temperature stored jars of the low-acid foods mentioned.

You have two choices for your type of pressure canner: a dial gauge canner or a weighted gauge canner. Most steps in managing the pressure canning process are the same, but the two styles have different types of gauges to indicate the pressure inside the canner. Expect to spend $100-$150 or more on a pressure canner.  USDA and National Center for Home Food Preservation processes have only been developed in traditional stovetop pressure canners managed as in Using Pressure Canners on our website.

If you use a dial gauge canner, then it’s important to have the gauge tested for accuracy before each canner season or if you drop or damage your gauge. It isn’t as easy as it used to be to get gauges tested. Try a local hardware store or your local Cooperative Extension agent, even though not all still provide this service. For either type of canner, check that the rubber gasket is flexible and soft, and if it is brittle, sticky, or cracked then replace it with a new gasket. Also check that any openings, like vent ports, are completely clean and open.

You’ll also need jars, lids, and ring bands manufactured for home canning. When getting started, new jars are a worthwhile investment (versus purchasing used jars from a yard sale or flea market) because very old jars may break under pressure and heat. Mason-type jars of standard sizes (e.g., half-pint, pint, and quart) are recommended for the tested processes available from science-based sources such as USDA and your land-grant university. Make sure those jars are manufactured and sold for canning purposes; not all glass and Mason-style jars are tempered to prevent breakage with the extreme heat and temperature swings during canning. When you actually get to canning your harvest, be sure to follow manufacturers’ advice for preparing your jars and lids. In addition to standard cooking utensils like cutting boards and bowls, a jar funnel, jar lifter, headspace measurement tool, and bubble-freer are items that you will want to have handy for canning.

If you are freezing your harvest, be sure to use packaging such as plastic bags or rigid containers that are intended for freezer storage of foods.  Not all plastics are the same, and you want materials that will hold up to freezer temperatures as well as protect your goodies from damaging air and mixtures of odors.

Growing your own? You may be lucky enough to have previously started keeping garden records so you remember the name of that great tomato or pepper variety you have liked this past year. If not, think about planning to keep records this year. A garden journal might include variety, seed source, date planted, date harvested, notes on how it grew and resisted disease, and your personal evaluation of the crop.

A final must is reliable, up-to-date canning and other food preservation instructsetp5ions. Specific kitchen equipment or ingredients could be needed to follow directions as they are written for food preservation. Look ahead to what you plan on canning so you can obtain or organize the equipment and tools needed before your garden produce is ready to use. And in the case of canning especially, very significant food safety risks are possible by following unsound recommendations. Reliable, up-to-date canning instructions are available at the NCHFP website, or in the USDA Complete Guide to Home Canning, So Easy to Preserve, or the county or local area Extension office in your state.

———–


A Good Time to Clean Out the Pantry

At this time where our national leaders and health experts are asking us to keep physical distance from others, remotely work from home if possible, cancel events and gatherings and generally spend more time at home, take advantage in the kitchen. Many of us could take stock of supplies in our food cabinets we may not have considered in a long time. You might find inspiration to re-discover pleasure in home cooking or just discover items you didn’t know you have!

cowboy caviarCanned vegetables and meat can be used for soups, casseroles or even side salads. Canned beans, chickpeas and green beans could be used for a marinated three-bean salad (or four or more!) and dressed up with just a little seasoned vinegar if you don’t have salad dressing.  Try some dried herbs in there if you don’t have fresh or find some surprises in your spice cabinet. If you don’t have fresh tomatoes but like the look of the mix I’ve pictured, you can use canned diced tomatoes instead.

soup photoCanned stock and vegetables along with some canned meat (or not) and beans can also make a tasty soup when you can be free to try your own seasonings.  (I know my homemade soup in the photo has some fresh kale and sausage in it, also, but hey, I had them to use. I just wanted to get your creative juices flowing.)

While you are in the pantry, think about giving it a good cleaning. A lot of us do not have the discipline to have been doing this on a regular basis throughout the year. When removing items to check your stock, take them all out and keep them out long enough to wash and dry shelves before replacing the food items. Use household cleaners (and EPA-registered disinfectants or a bleach solution if you also sanitize) that are appropriate for the surface in your pantry, following label instructions. Labels contain instructions for safe and effective use of the cleaning product including precautions you should take when applying the product, perhaps such as wearing gloves and making sure you have good ventilation during use of the product.  Then, before putting your foods and storage containers back, wipe them off with a warm, soapy dish cloth and dry with a paper towel (or clean cloth towel if paper is an issue for you at these times of short supply).

Remember when preparing food, wash cutting boards, dishes, utensils (including knives), and countertops with hot, soapy water after preparing each food item and before going on to the next food.  Then, sanitize cutting boards and kitchen countertops using a kitchen sanitizer. One teaspoon of liquid chlorine bleach per quart of clean water can also be used to sanitize surfaces. Leave the bleach solution on the surface for about 3-5 minutes to be effective. It is best to let surfaces air dry, but if you have to, rinse with cold water and pat dry with fresh paper towels. (If you are in household with a person ill from COVID-19 or suspected ill from it at this time, follow CDC advice for cleaning and disinfecting: https://tinyurl.com/vyc9tdv)

Consider using paper towels to clean up kitchen surfaces. Then the germs get thrown away with the towels! Knowing paper supplies are in demand now and short supply, launder cloth towels often, using hot water. Do not dry your hands with a towel that was used to clean up raw meat, poultry, or seafood juices. These raw juices can contaminate your hands and other surfaces. Put those towels immediately into the laundry bin and wash soon.

Check out your refrigerator also. Wipe up spills immediately. However, while you are in the deeper kitchen cleaning mode, clean the inside walls and shelves with hot water and a mild liquid dishwashing detergent; then rinse.  Once a week, you should already be checking expiration and “use by” dates on refrigerated foods.

Back to preparing food, especially if that has not been your regular kitchen activity for a while. Always keep raw and ready to eat foods separated. Cross-contamination is the word for how bacteria can be spread from one food product or to another, or from a dirty surface or hands to food. This process begins at the grocery store and continues with carry home bags, and your refrigerator. Use one cutting board for raw meat, poultry, and seafood and another cutting board for ready to eat foods. Never place cooked food on a plate that previously held raw meat and poultry unless the plate has been thoroughly cleaned.

Cook food to the proper temperature. Use a food thermometer to make sure meat and poultry are cooked to a proper temperature and keep a cooking internal temperature chart handy. Chicken and turkey should be cooked to an internal temperature of at least 165°F to be safe; ground meat and meat mixtures to at least 160°F; egg dishes like quiche to at least 160°F; seafoods to at least 145°F ; beef and other red meat roasts and chops to at least 145°F with a 3-minute stand time before serving. Use a clean, calibrated food thermometer to check the food for doneness in at least two places in the center or the thickest part. For reasons of personal preference, many people prefer to cook chicken and turkey to higher temperatures such as 170-180°F to remove pink appearance and rubbery texture. Thoroughly reheat leftovers to 165ºF internal temperature and be sure to bring gravies, sauces and soups to a rolling boil.

Finally, chill everything promptly! Refrigerate or freeze leftovers within 2 hours by placing them in shallow containers to cool rapidly. Keep the refrigerator temperature at 40ºF or below and the freezer at 0ºF. Monitor the temperature with an appliance thermometer. Always thaw food in the refrigerator, in a cold water bath of running water, or in the microwave right before cooking it.

For more information on storing foods, including freezer packaging choices and headspace for freezer containers, see general sections on these topics available from the National Center for Home Food Preservation at the University of Georgia, https://nchfp.uga.edu.  Also see the Food Keeper app and website: https://www.foodsafety.gov/keep-food-safe/foodkeeper-app

###

Preserving Those Unripe Tomatoes

Some of us have planned purposes for green, unripe tomatoes early in the season – like my mother’s delish green tomato relish recipe! – while others are grabbing end of season unripe tomatoes off the vines before the frost hits. Now you have a lot of these green tomatoes, what to do with them? greentom_blog

Unripe tomatoes may be canned like ripe tomatoes, following the same directions including acidification. Even though unripe tomatoes should have a lower pH (higher acid content) than their ripe counterparts, we do not know if even in the unripe stage your variety and growing situation may mean they are still above pH 4.6. So follow the USDA directions for canning tomato and tomato products, including the acidification. See the acidification advice even for green tomatoes here: https://nchfp.uga.edu/how/can_03/tomato_intro.html and the available canning procedures for tomatoes here: https://nchfp.uga.edu/how/can3_tomato.html

How about that prized relish in our family?  That and other relishes calling for green tomatoes include

And, even though it doesn’t call for green, unripe tomatoes, I might throw in the more unusual, very tasty Oscar Relish to help use up those red tomatoes being grabbed off vines before the frost, also: https://nchfp.uga.edu/how/can_06/oscar_relish.html .

Green-Tomato-Pie-049-photoshopped
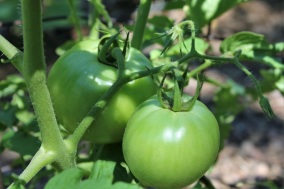
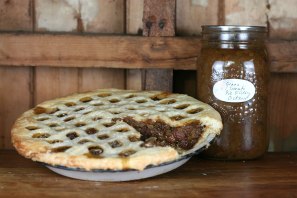
Another option for something a bit different (and not a relish), is the Green Tomato Pie Filling: https://nchfp.uga.edu/how/can_02/can_pie/green_tomato_filling.html This will give you a great headstart for something to have handy during winter holidays (or really anytime).

Image courtesy of Randal Oulton

Some look forward to the summer treat of fried green tomato slices; you can freeze your raw slices and have them for frying later in the year, also:

Freezing green tomato slices: https://nchfp.uga.edu/how/freeze/tomato_green.html

For more information on canning and freezing methods, including packaging choices and headspace for freezer containers, see general sections on these topics available from the National Center for Home Food Preservation at the University of Georgia, https://nchfp.uga.edu.

###