Category Archives: Recipes

Pickling…Not just for Cucumbers

Pickled Cantaloupe

Dill, sweet, fresh-pack, fermented…there are many varieties of pickles to choose from. While these types of pickles are available on grocery shelves as well as in recipes, most of the pickles on the grocery shelves are made with cucumbers. What if you want to try a different type of fruit or vegetable as a pickled product? Then follow the links to tested recipes from the National Center for Home Food Preservation and add one or two of these fruit and vegetable pickle recipes to your home food preservation practice.

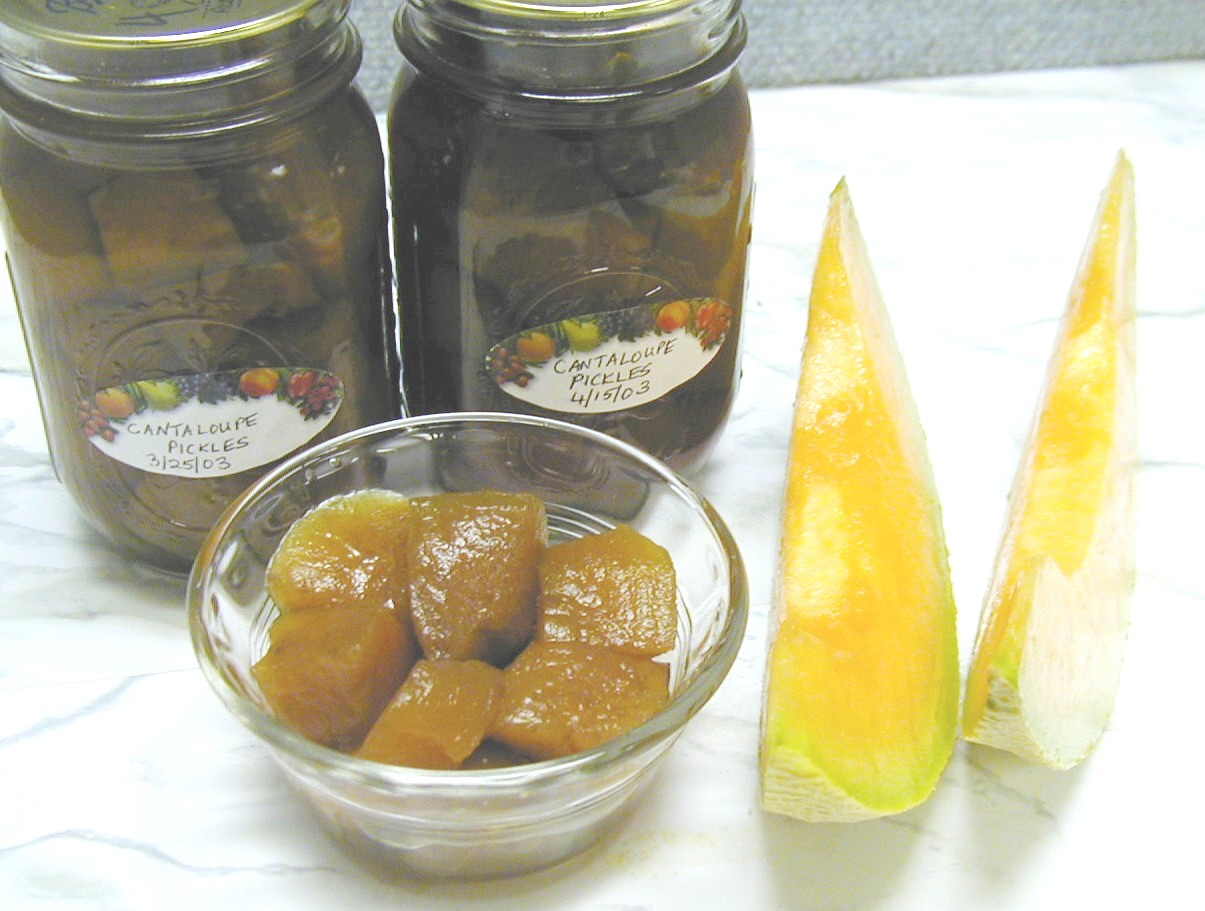
Interesting vegetable recipes include Bread and Butter Pickled Jicama, Pickled Sweet Green Tomatoes, and Pickled Horseradish Sauce.  (Note the horseradish sauce is to be kept in the refrigerator only; there is not a canning process to recommend.)  If you are keen on the flavor of fruit pickles (or interested in a taste adventure), then you might like to try Watermelon Rind Pickles, Spiced Crabapples, or even Cantaloupe Pickles (also available is a No-Sugar Added Cantaloupe Pickles recipe). Quite a few more fruit and vegetable pickle recipes are also available.

Pickled Pearl OnionsPickled Baby Carrots

Remember that the level of acidity is not just important for the taste and texture of your pickled products, but also for the safety of the product. For every tested recipe, the recommended amount of vinegar is necessary for a uniform acidity throughout the product to prevent the growth of botulinum bacteria. Do not alter the proportions of vinegar, water, or foods in tested recipes, and please, use tested recipes.

As for your produce, select fresh, firm fruits or vegetables that are free of spoilage or other damage, and wash them well.

Visit the NCHFP website for more information about Preparing and Canning Fermented and Pickled Foods.

Since You Can’t Have Too Many Tomatoes…

Tomatoes

Just as the tomatoes in your garden grow and the varieties of tomatoes in markets continue to increase in number, we also encounter a generous assortment of directions for canning tomatoes. But canning your tomatoes does not have to be too complicated, if you simply use reliable, research-based directions for preparing and processing your food.

For example, home canned tomatoes may be crushed so that they are ready-to-use, or left whole or halved. Whole or Halved Tomatoes may be canned with water, in tomato juice, or with no added liquid. While the no-added-liquid version of canned tomatoes is a raw pack, Crushed Tomatoes are a hot pack only. Tomato Juice can be made as is or as a Tomato-Vegetable Juice Blend, as hot packs only. Also only available as a hot pack is Tomato Sauce.  Many more classic canned tomato product directions are available, such as Spaghetti Sauce with or without meat and Ketchup.

Canned Tomatoes

No matter how you choose to can your tomatoes, remember that it is very important to use a canning process time that matches up with the preparation directions for filling your jars. Also, it is important to the safety of your canned tomato products to use tested directions, like those from USDA. For many of these tomato products, there are canning options for both boiling water and pressure canning available in our directions.

In the case of these tomato products with both options, the pressure processing still requires acidification in these products. The pressure options only provide the same amount of heat to the product as the boiling water processes. Just because pressure is used to decrease the process time, the canning process is not the same as one to destroy spores of Clostridium botulinum as you would expect for low acid foods.

Peeled Tomatoes

Tomatoes are borderline in pH between acid and low acid foods, so the USDA preparation directions for these products call for acidification to allow a less severe heat treatment than would be required without it. To ensure safe acidity in whole, crushed, or juiced tomatoes, add two tablespoons of bottled lemon juice or ½ teaspoon of citric acid per quart of tomatoes. (Citric acid results in a less noticeable change in taste for most people.) For pints, use one tablespoon bottled lemon juice or ¼ teaspoon citric acid. Acid can be added directly to the jars before filling with product; in fact, this is recommended to be sure you get the acid in each and every jar. Sugar may be added to offset an acid taste, if desired, but the acid cannot be decreased to taste. (Four tablespoons of a 5 percent acidity vinegar per quart may be used instead of lemon juice or citric acid. However, vinegar may cause undesirable flavor changes.)

The National Center for Home Food Preservation has recommended directions for canning tomatoes and tomato products under “How do I”….”Can”…..”Canning Tomatoes and Tomato Products“.

This entry contains excerpts from an article called “Sorting Out Tomato Canning Directions” written by Elizabeth Andress, PhD and Director of the National Center for Home Food Preservation.

Delightful Fresh Dill Cucumber Relish Recipe

If you haven’t planted cucumbers or dill yet, then this recipe might bring you inspiration to get out and add these delicious plants to your garden. Fresh Dill Cucumber Relish is our own take on a sweet, not salty, relish that is great for your homegrown fresh dill. For a sweet, light, refreshing treat, chill this relish in the refrigerator and try it on tortilla chips!

If this is your first time canning, or if you could use a review of the basics, please read Using Boiling Water Canners and Principles of Home Canning before beginning.

Fresh Dill Cucumber Relish

Makes about 6 to 7 pint jars

Ingredients:

–          12 cups chopped pickling cucumbers (about 4 ½ pounds)

–          3 cups chopped red bell pepper

–          1 cup chopped onion

–          ¼ cup pickling or canning salt

–          4 cups crushed or cubed ice

–          8 cups water

–          5 cups cider vinegar (5%)

–          1 cup sugar

–          1 cup water

–          2 tablespoons mustard seed

–          1 cup chopped fresh dill

–          1 teaspoon garlic powder

Procedure:

  1. Wash and rinse pint canning jars; keep hot until ready to use. Prepare lids and bands according to manufacturer’s directions.
  2. Prepare cucumbers and peppers by first washing them well. After washing the cucumbers, slice a thin piece from both the stem and blossom ends and discard. Cut into about 1-inch pieces and then chop in a food processor (using about 3 pulses on “chop”) to yield about ¼-inch or slightly larger pieces. Measure 12 cups of the chopped cucumber.
  3. After washing the peppers, remove the stem, seeds and white membranes. Cut into about 1-inch pieces or slices and then chop in a food processor (using about 3 pulses on “chop”) to yield about ¼-inch or slightly larger pieces. Measure 3 cups of the chopped pepper.
  4. Remove the skin from onions. Wash well and chop into about ¼-inch cubes, or process to size in a food processor as for peppers. Measure 1 cup of the chopped onion.
  5. Combine measured chopped cucumber, pepper and onion with salt, ice and the 8 cups water in a large bowl or saucepot. Cover; let stand 3 to 4 hours in refrigerator. Drain; rinse thoroughly with ice cold water and drain well again through a cheesecloth-lined strainer (until no more water drips through, about 15 to 20 minutes).
  6. Heat vinegar, sugar, 1 cup water, and remaining ingredients in a stockpot while stirring, until sugar dissolves. Add drained, chopped vegetables, and bring to a boil. Reduce heat and simmer 10 minutes.
  7. Fill hot relish into clean, hot pint jars leaving ½-inch headspace. Remove air bubbles and adjust headspace if needed. Make sure liquid covers the top of the food pieces. Wipe rims of jars with a dampened, clean paper towel; apply prepared canning lids.
  8. Process in a boiling water canner according to the recommendations in the table below. Let cool, undisturbed, 12 to 24 hours and check for seals.
Table 1. Recommended process time for Fresh Dill   Cucumber Relish in a boiling-water canner.

Process Time at Altitudes   of

Style of Pack

Jar Size

0 – 1,000 ft

1,001 – 6,000 ft

Above 6,000 ft

Hot

Pints

15 min

20

25

Note: This recipe was developed at The University of Georgia, Athens, for the National Center for Home Food Preservation. It is also available at http://nchfp.uga.edu/how/can_06/fresh_dill_relish.html.

Strawberry-Kiwi Jam Recipe

Strawberry Kiwi JamStrawberry-Kiwi Jam jars

Blending the local with the exotic, Strawberry-Kiwi jam is a flavorful extension of a classic strawberry jam. Strawberries are plumping up on farms in the southern states. If you’re farther north, then you might want to save this recipe for June or July when you’ll have fresh berries of your own. Or, you can pluck some strawberries off a shelf at the grocery store while you are purchasing the more exotic ingredients that most likely don’t grow close to home: kiwis and (crystallized) ginger.

Crushing StrawberriesChopping KiwiMincing Crystallized Ginger

Strawberry-Kiwi jam is a slightly tangy, subtly spicy, but mostly sweet jam. It goes great on toast, and if you like to bake then try it in thumbprint cookies or with cake. Home canning beginners may want to follow the illustrated instruction guide available here: Step-By-Step Preserving Strawberry-Kiwi Jam. Please also read Using Boiling Water Canners and Principles of Home Canning before beginning. For those of you already comfortable with the basics, here’s the recipe from the University of Georgia publication So Easy to Preserve:

Strawberry-Kiwi Jam with powdered pectin

Makes about 6 half-pint jars

–          3 cups crushed strawberries

–          3 kiwi, peeled and diced

–          1 tablespoon lemon juice

–          1 tablespoon minced crystallized ginger

–          1 package powdered pectin

–          5 cups sugar

Procedure:

  1. Wash canning jars and keep warm.
  2. Prepare two-piece canning lids according to manufacturer’s directions.
  3. Combine strawberries, kiwi, lemon juice, ginger and pectin in a large saucepot. Bring quickly to a boil, stirring frequently.
  4. Add sugar, stirring until dissolved.
  5. Return to a rolling boil. Boil hard 1 minute, stirring constantly.
  6. Remove from heat. Skim foam if necessary.
  7. Ladle hot jam into hot jars, leaving ¼ inch headspace.
  8. Wipe jar rims and adjust lids.
  9. Process in a Boiling Water Canner using recommended process times in the table below.
Table 1.   Recommended process time for Strawberry-Kiwi Jam in a boiling water canner

Process   Time at Altitudes of

Style   of Pack

Jar   Size

0   – 1,000 ft

1,001   – 6,000 ft

Above   6,000 ft

Hot

Half-pints
or Pints

10   min

15 min

20 min

Open jars of jam Turning Until Fingertip Tight

If you’re not able to access the Step-By-Step instructions, then go to http://nchfp.uga.edu/how/can7_jam_jelly.html and click on “Step-By-Step Preserving Strawberry-Kiwi Jam”.