Category Archives: Food Safety

The Hunt is On: Know the Basics of Venison Preservation

Exact dates for deer hunting season vary across the United States, but wherever you are, fall is the time of year that deer are most active and most actively hunted. To help you make the most of your wild game, here are a few tips and recommendations (follow the links below) for safely preserving the highest quality venison.

Sanitation begins in the field. Be careful not to contaminate the carcass when field dressing the deer. Cool the meat to 35 to 40 degrees Fahrenheit as quickly as possible.

Proper aging reduces the game taste, tenderizes tissues, and gives the meat better cutting quality. Never age meat at room temperature. Age meat at an air temperature of 40 degrees F or less for no more than 2 to 3 days in a clean, dry, well-ventilated storage facility. If you are making sausage, then aging is not needed.

Refrigerated meat needs to be used within 2 to 3 days.

Freezing Venison:

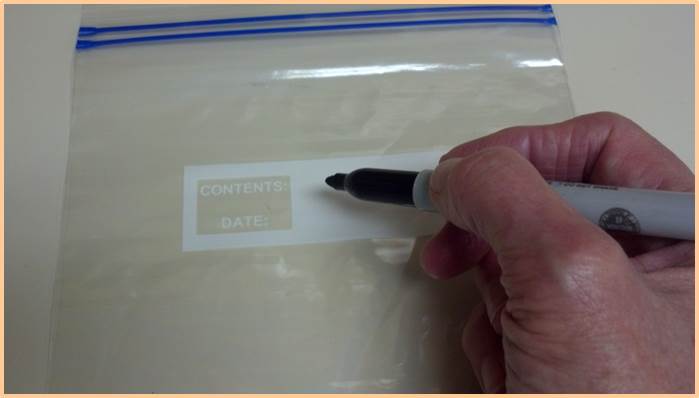
Fat goes rancid quickly, so trim fat and clean cuts. For best quality, separate into meal sized portions (usually about one pound) then either use a vacuum sealer or wrap the meat tightly in waxed paper, plastic freezer wrap, aluminum foil, or plastic freezer storage bags, and if not already sealed then seal in a freezer bag or container. Remember to label and date each package. Freeze quickly at 0 degrees F or below. At this temperature, store venison for up to 9 to 12 months.

Labeling plastic freezer bag

Venison Sausage:

Breakfast-type Sausage

Summer Sausage and Smoked Sausage

Quick Sausage and Wild Game Polish Sausage (page 9)

Canning Venison:

Strips, cubes, or chunks

Mincemeat

Chile Con Carne (substitute venison for beef)

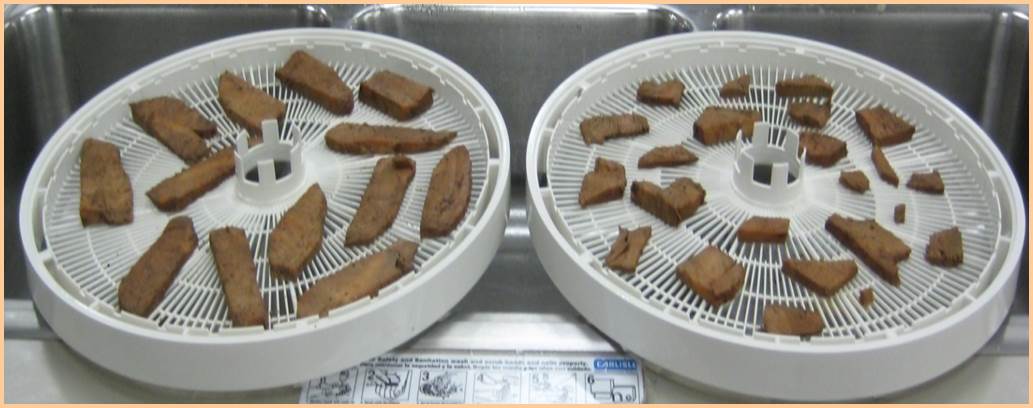
Curing/Smoking Venison:

Corning; Sweet and Hot Pickle Cure

Dry Curing Game

Venison Jerky

Pieces of meat on dryer trayEnjoy! jerky

Information in this document is based on Resources for Home Preserving Venison by Brian Nummer and Proper Care and Handling of Venison from Field to Table by Penn State Cooperative Extension.

Pick a Bean, any Bean…


There are so many different types of beans (although we don’t actually have recommendations for canning jelly beans, sorry, but that would be a sticky mess). Likewise, you have many choices for canning them. If you are deciding what to do with your harvest of beans, or maybe just hankering to put some up just the way you like them, then use the links below to find tested recommendations from USDA.

As a low-acid food, beans require the use of a pressure canner for canning them. If you are new to pressure canning or could use a refresher of the basic how-to, then please read Using Pressure Canners before beginning. If this is your first time canning, then also read Principles of Home Canning.


All Varieties of Shelled, Dried Beans or Peas may be canned in water using this basic, no-frills recommendation that includes only salt as an optional addition. If you’d rather can hearty flavor into your beans, and you have a full day to boil and bake, then prepare Baked Beans, with molasses, vinegar, salt, mustard, and bacon. If you don’t have quite enough time for all that, but still want that sort of flavor, then try Beans, Dry, with Tomato or Molasses Sauce.

If your beans are of the Lima variety, then follow these directions for Fresh, Shelled, Lima Beans. Follow these similar procedures, but slightly different directions for Snap and Italian Green and Wax Beans. As you’re deciding whether to prepare a hot pack or raw pack, remember that hot packs are often considered to produce the highest quality final product, and you can often fit more beans into one jar, but raw packs do cut down on the prep time.

Green Beans

If canning is not your preservation method of choice, then refer to our recommendations for freezing beans – blanching times vary slightly between Green, Snap, or Wax Beans and Lima, Butter, or Pinto Beans .


Your Favorite Salsa Recipe…Is it Safe to Can?

Raw ingredients for salsa

Maybe you inherited a delicious salsa recipe from your father and you’d like to ship it out the entire family, or maybe you got creative in the kitchen with your kids and would love to store jars of their salsa for a surefire snack throughout the school year. But then you wonder: is that unique blend of ingredients safe to can at home? Here are a few reasons why that’s an important question to ask, and a few resources to help answer it.

Cutting tomatoesChopping jalapenos

  • Salsas are a mix of acid and low acid ingredients. Overall pH is what determines if a product is safe to be processed in a boiling water canner. If a salsa is not adequately acidified to a pH of 4.6 or below, then processing in a boiling water canner will not provide enough heat to prevent toxin-production by botulism-causing bacteria. Sufficient, carefully calculated amounts of vinegar or another acid are necessary ingredients for acidification.
  • Without detailed knowledge of the ingredients, proportions, and procedure used for a salsa recipe, there is no way to tell is the product is safe for boiling water canning. Unfortunately, we at the National Center are not able to fund and staff product testing for individual recipes. Here is a link to learn more about the science behind determining the Heat-Processing of Home-Canned Foods.
  • If you are determined to can your own salsa, please call your local Cooperative Extension office and ask if they have contact information for private testing companies. This link will help you Find Your County Office.
  • Fortunately, USDA and Cooperative Extension have a variety of tested recipes and processes for canning salsa at home. Ten different and diverse salsa recipes as well as background information and step-by-step boiling water canning directions can be found in the University of Georgia publication Sensational Salsas. If you want to view the recipes by themselves, follow this link to the NCHFP webpage “How Do I?…Can Salsa”. From there you’ll see that each salsa recipe is also available in Spanish.
  • Some equipment and home preserving ingredient manufacturers also offer more recipes to try, but first do some research to find out if they are indeed reliable companies with tested recipes.

Mango Salsa Raw Mix

Pickling…Not just for Cucumbers

Pickled Cantaloupe

Dill, sweet, fresh-pack, fermented…there are many varieties of pickles to choose from. While these types of pickles are available on grocery shelves as well as in recipes, most of the pickles on the grocery shelves are made with cucumbers. What if you want to try a different type of fruit or vegetable as a pickled product? Then follow the links to tested recipes from the National Center for Home Food Preservation and add one or two of these fruit and vegetable pickle recipes to your home food preservation practice.

Interesting vegetable recipes include Bread and Butter Pickled Jicama, Pickled Sweet Green Tomatoes, and Pickled Horseradish Sauce.  (Note the horseradish sauce is to be kept in the refrigerator only; there is not a canning process to recommend.)  If you are keen on the flavor of fruit pickles (or interested in a taste adventure), then you might like to try Watermelon Rind Pickles, Spiced Crabapples, or even Cantaloupe Pickles (also available is a No-Sugar Added Cantaloupe Pickles recipe). Quite a few more fruit and vegetable pickle recipes are also available.

Pickled Pearl OnionsPickled Baby Carrots

Remember that the level of acidity is not just important for the taste and texture of your pickled products, but also for the safety of the product. For every tested recipe, the recommended amount of vinegar is necessary for a uniform acidity throughout the product to prevent the growth of botulinum bacteria. Do not alter the proportions of vinegar, water, or foods in tested recipes, and please, use tested recipes.

As for your produce, select fresh, firm fruits or vegetables that are free of spoilage or other damage, and wash them well.

Visit the NCHFP website for more information about Preparing and Canning Fermented and Pickled Foods.